Installing onto a USB flash drive
While most of the development and testing of MOSA is done using virtualization software, MOSA does indeed boot on real hardware too.
There are several ways to put MOSA on a USB flash drive. Below are the most common ones, including the one we’ll be following here:
Ventoy (Windows, Linux), allows reusing the same drive for multiple images and other content
Rufus (Windows only)
dd (Linux, unofficial Windows version exists)
We’ll be following the Ventoy path here. Let’s get started!
Create a MOSA disk image using the launcher or the console launcher tool.
Download the latest version of Ventoy for your platform and extract the archive.
Launch the GUI program for your computer’s architecture. You should now see a window that looks roughly like this:
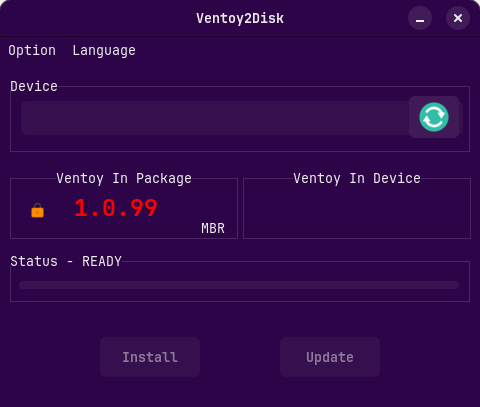
Go to Option, and select the correct partition style for the target machine (MBR for BIOS, GPT for UEFI, although some recent BIOS-based machines can still read GPT-based drives). You’ll need to follow extra steps for booting with Secure Boot though.
Select your drive in the drop down, then, when you’re ready, click
Install.
Danger
When installing Ventoy for the first time, all data on the USB flash drive will be lost!
If you just wish to update an existing Ventoy installation on the drive though, click Update. This will not erase any data on the drive and will instead only update Ventoy’s partition on the drive.
Close out of the Ventoy GUI, and navigate to your USB flash drive’s main partition. All that’s left to do is to copy the disk image you previously created, and paste it onto your USB flash drive, and you’re done!